Profile Projectors
- What is Profile Projector (Optical Comparator)?
- Profile Projector Parts
- Measurement by Profile Projector
- Comparator Disadvantages
- Why choose KEYENCE?
What is Profile Projector (Optical Comparator)?
Profile projectors (optical comparators) are a type of optical measuring instrument. The measurement principle is similar to that of optical microscopes. The target is placed on the stage, and a light is shined on the target from underneath. This causes the target's profile, or shadow, to be projected on the screen. A telecentric optical system is used to enable accurate measurements.
Profile projectors were originally developed to inspect the outlines of targets. Models equipped with measurement functions appeared later. Some large profile projectors have screen diameters that exceed 1 m.
Profile projectors are also commonly known as an optical comparator or shadowgraph.
Profile Projector Advantages
Non-contact measurement that doesn't skew measurement of flexible parts or damage sensitive parts.
Measurement is possible even for targets with small or complicated shapes.
Unlike measuring microscopes, there is no need to look through an ocular lens, which makes it possible for multiple people to perform observations at the same time.
The use of profile projectors is widespread in the inspection and measurement of items such as electronic components and precision components. Conventionally, time and effort required for datum referencing and target positioning.
Profile Projector Principle (Telecentric Optical System)
A typical profile projector illuminates from below and projects the shadow of the measuring object placed on the stage through a projection lens onto a projection screen. For this reason, it’s also known as an optical comparator or shadowgraph.
At this time, the size of the projected image is an image magnified with a correct magnification from the measuring object, and the dimension of the measuring object is measured by measuring this image.
An optical system called a "telecentric optical system" is used in the profile projector so that it can be projected with accurate magnification from any position on the stage. With a general lens, near objects look large and distant objects appear small, which allows you to judge perspective. Telecentric lenses, on the contrary, project the same size for near and far objects.
This telecentric lens allows you to cast the shadow of an object at the correct magnification without warping the image.
Profile Projector Parts
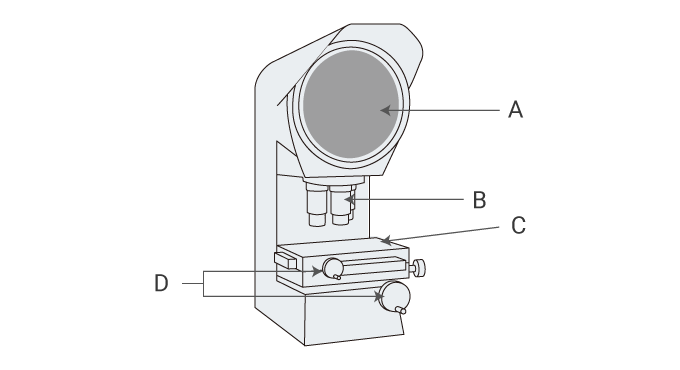
- A
- Projection screen
- B
- Projection lens
- C
- Movable stage
- D
- Stage movement handles (X and Y handles)
Profile Projector Accessories
Fixtures
Fixtures used for profile projectors are used to fix the object in place to be measured in the correct orientation. For example, a round object can be fixtured horizontally by clamping it down, or for fixing an object whose bottom surface is not flat in an orientation suitable for measurement.
There are various types of fixtures including clips, clamps and magnets.
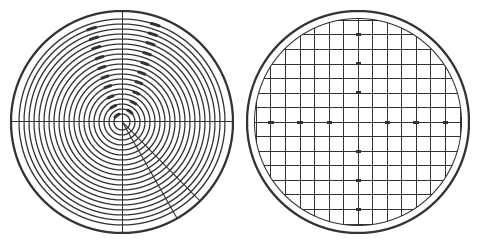
Mylar Overlay Chart
The overlay chart is used by matching it with the measurement image projected on the screen. There are various types of charts. For example, those with a grid or concentric scale are generally used.
In addition, by overlaying the diagram chart in which the design value of the measurement target is magnified at the same magnification, it is possible to see how the contour of the design value differs from the actual measurement target by superimposing it on the projected image.
Surface Illumination
The profile projector can not only illuminate from below and transmit light to create a shadow, but can also illuminate from above (lens side) to project outlines.
Even if the measurement target is difficult to measure with only the transmission (backlit) image, it is possible to measure it by using the epi-illumination.
Curtain
Blackout curtains are used to block light coming from outside. It is used for the purpose of projecting a shape more accurately by blocking ambient light.
Precautions, Maintenance and Calibration
Conventional profile projectors require regular maintenance in order to continuously and accurately perform measurements. Maintenance is often performed onsite by a technician as the tool is generally to large to send and receive regularly.
In addition, regular calibration is required to confirm that the accuracy is as specified. A profile projector’s calibration cycle is 6 months to 3 years. As with maintenance, calibration is generally performed locally.
How to Use (Basic)
Place the object on the stage.
A scale is applied to the image projected enlarged on the screen to measure the dimensions. Alternatively, you can use the XY stage together and measure the dimensions from the amount of movement.
A profile projector with a computerised calculation function, you can obtain various measurement results such as width, diameter, and angle by taking measurement points while moving the stage.
Measurement by Profile Projector
How to Measure a Length/Width
Place the object to be measured on the screen and adjust the height of the table to focus.
Next, align the orientation of the side you want to measure on the projected image with the orientation of the screen reference line, and adjust the value of the XY stage to 0.
Next, move the stage using the stage movement handle and align the other side of the projected image to be measured with the screen reference line.
At this time, the movement amount of the stage is displayed in each of the X and Y directions, so this value becomes the measured value. In the case of simple measurement in only one direction, the amount of movement in only the X or Y direction is used.
How to Measure a Radius/Diameter
Place the object to be measured on the screen and adjust the height of the table to focus.
Next, align the centre point of the circle on the projected image with the point where the screen reference line is public.
In the case of radius, take 0 points here and move the stage to check the movement amount at the point where the edge of the circle was at the centre of the stage. In case of diameter, move the stage once from here to the edge of the circle, take 0 point, and move to the opposite edge to check the amount of movement. In either case, it is common to measure in four directions in a cross shape.
It is also possible to measure by applying a concentrically graduated sheet called a "chart" to the screen.
In the case of a profile projector with a calculation function, the diameter and radius are automatically calculated by taking three measurement points at the edge of the circle.
How to Measure Angles
There are several ways to measure the angle.
A method of checking the amount of rotation of the stage by rotating the stage in the θ direction by aligning the straight line of the projected image with the reference line of the screen.
There is a method of checking by putting a sheet called "chart" with fine scale like a protractor on the screen.
On a profile projector with a calculation function, the angle is calculated by specifying two straight lines.
How to Use Overlays
There are several types of charts.
For measuring the diameter and radius, there are concentric circle marks, for measuring angles, there are radial marks, and for both. In addition, some of the scales are written in a grid to see the XY coordinate values. Both are placed on the screen and measured by matching them with the projected image.
Comparator Disadvantages
While the profile projector is a convenient measuring instrument that can perform various measurements, there are a few obstacles users can encounter.
Measurement Stability
- The position to focus on differs depending on the person, causing a measurement error.
- Work efficiency and measured values differ depending on the skill of the person.
Responsiveness
- When comparing shapes, it is necessary to superimpose a 10x enlarged drawing on the projected image and visually confirm the difference.
- It is not possible to acquire the numerical values of the differences from the dimensions and drawings with the measuring instrument.
- It is difficult to store and compare data, such as transferring contour shapes to trace paper.
Cost and Effort
- It takes time to manually move the XY stage to adjust the position and orientation of the target object and acquire the coordinates of the measurement points one by one to measure.
- In the case of an object with a step, it is necessary to focus on each change in the height of the measuring point.
- Writing various documents and contour shapes is a manual process, which requires a lot of man-hours.
Why choose KEYENCE?
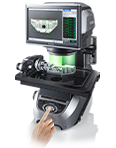
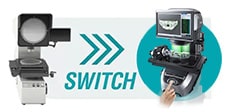
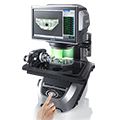
KEYENCE's IM Series Instant Measurement system was designed to be the next-generation profile projector.
- Ease-of-Use - Just place a part on the system's stage and push a button to fully-inspect a part.
- Speed - The system automatically measures a part in 3 seconds or less.
- Accuracy - High-precision optics and cameras allow for up to +/- 2 μm accuracy